Welcome

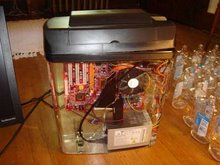
Welcome to Testing Grounds. This website will help you discover new ways of looking at the ordinary things around you. Whether it is a dusty old computer you have in the corner, or a coke machine down the street, Testing Grounds will show you how to do things you didn't think were possible. Enjoy!

What to look forward to:

Coming up on Testing Grounds, I'll show you how to do the following:

How to Install/Reinstall Windows Vista to Improve Performance

How to Backup DVD's: Defeat Any DVD Protection Including Sony and Disney

Tuesday, July 31, 2007

Open DNS, The Faster Domain Name System!

When you type in an address at the top of your browser, lets say you want to visit www.weather.com for instance, your computer sends a request to a DNS server that it is connected to. In most cases this is provided by your ISP (Internet Service Provider), and is usually retrieved automatically using DHCP. The DNS server is like a phone book for the internet. It takes the address you typed in (www.weather.com) and looks it up, finding the IP address of the server containing the web page. This accounts for part of the time it takes to load a web page, because your request is put in line with a thousand others and it takes a few milliseconds to process. Once the server has found the appropriate IP address for the page you are looking for, it directs it your way.

Now, why change which DNS server you use? Well maybe your ISP provides you with a crappy one, maybe you think your internet is a bit slower than it should be, or maybe you just want to be a propper geek, and change everything about your computing experience that you can. It doesn't matter, because in almost every case, changing from ISP DNS to Open DNS will improve performance, it may not be noticible and only visible in added milliseconds, but the improvement will be there.

How can you change your DNS server's address? I'll show you how to do so in Windows and in OS X. If someone would like to share how to do so in Linux, let me know.

In OS X:

Go to System Preferences, Network, click on your Ethernet or Wireless network settings and click Configure, And where it has DNS Servers, add these two IP addresses:

208.67.222.222
208.67.220.220

Image Hosted by ImageShack.us

Image Hosted by ImageShack.us

Image Hosted by ImageShack.us

There, all done for OS X!

In Windows (basically all versions):

Go to Control Panel,
Network Connections, click on your connection(s) - whether they are wireless or not, then double click on the correct icon, hit properties, then scroll down to TCP/IP and hit properties. De select Obtain DNS automatically, and input the same IP addresses as in OS X:

208.67.222.222
208.67.220.220


Image Hosted by ImageShack.us

Image Hosted by ImageShack.us

Image Hosted by ImageShack.us

If you want to learn more about what Open DNS is, and how they operate, visit their website at:
http://www.opendns.com/

Hope you enjoy!