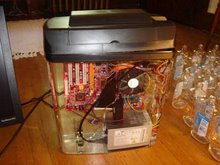
OS X Leopard was cracked for PC consumption the day of its release. This was mostly accomplished because Leopard was meant from the beginning to be used on computers with the x86 Intel architecture. The roadblock keeping OS X from naturally running on any pc is something called EFI, or Extensible Firmware Interface. The EFI that Leopard uses is only tooled to work with Apple hardware, which means that it needs to be patched. The original method of patching was to use a thumbdrive attached to the computer and utilize the terminal to transfer files from the thumbdrive to the operating system files of Leopard. Compared to installing Tiger onto a PC, this method was ridiculously easy and was all that was required to have a successful boot of Leopard. But a better solution is now available, one where no thumbdrive is required and installation is streamlined and so easy that nearly anyone can do it.
OK, first thing's first.
This is a set of guidelines for installing OS X Leopard onto a PC. What you choose to do with this information is up to you, and I am in no way responsible for whatever happens to your machine.
The things you need for this project are as follows:
Preparations:
In order to install Leopard, you first need to get the Leopard OSX86 installation disk. Now, the legality of this is somewhat questionable. The general consensus is that there are three ways to go about this, and I will order them in the most painful to least painful:
Then you need to burn the .iso file to the blank DVD. I prefer using Nero to do the burning, but you may have another program that does a similar job.
If you’ve never booted from a CD or DVD on your system, then follow the outlined steps. If you already know how then just skip the next paragraph.
Insert the dvd into your dvd drive and shutdown the computer. Then whenever the computer boots up, pay attention to if it says anything about boot sequence or BIOS setup in the first few seconds of booting. For most Dell systems that I’ve come across the Boot Sequence option can be reached by hitting F12 at startup. For HP it is usually F2. Other BIOS’s might be Del or any of the F keys. Then select your CD/DVD drive, and the computer will boot from it after hitting enter.
Unfortunately I was not able to get a good screenshot of the first few stages of the installation process, but I will tell about every screen that you should come across until I can show actual screenshots.
Something along the lines of “Press any key to start the disk. . .” will appear on the screen.
You will need to press a key in order to start the installation process, otherwise the disk may boot into a bootable partition that it finds on your hardrive.
“Loading Darwin x86 . . .”
The length of loading depends on your system configuration, but mostly depends on how much RAM you have. Having 2 GB of RAM is very nice compared to 512 MB.
Now I have pictures. They will go through each screen that is encountered throughout installation.
The things you need for this project are as follows:
- High Speed Internet Connection (Useful if you want the disk image before the end of time)
- Blank DVD-R
- Nero, or some other program that allows the burning of disk images to blank media
- A BitTorrent program such as BitComet or Transmission
- A computer with the following attributes:
- Processor with either SSE2, SSE3, or SSE2/3 capabilities.
- at least 512 MB RAM
- at least 9 GB of free disk space
- A DVD drive for installation
Preparations:
In order to install Leopard, you first need to get the Leopard OSX86 installation disk. Now, the legality of this is somewhat questionable. The general consensus is that there are three ways to go about this, and I will order them in the most painful to least painful:
- Become an Apple developer. After several years or decades of convincing Apple Corp. that it would be a great idea to open up their kick ass operating system to the public for use on PC's, you can probably install the now defunct and outdated leopard onto your PC free of legal worries.
- Buy a Leopard License, and then go and download Leopard from one of a plethora of Torrent websites. So that way at least your giving your money for a Leopard license and choosing to use it on a computer. Even though the license agreement specifically states that you cannot use OS X on anything but apple software. Oh well, it happens.
- Who cares, just download it. This is the most common method, and also the least legal.
Then you need to burn the .iso file to the blank DVD. I prefer using Nero to do the burning, but you may have another program that does a similar job.
If you’ve never booted from a CD or DVD on your system, then follow the outlined steps. If you already know how then just skip the next paragraph.
Insert the dvd into your dvd drive and shutdown the computer. Then whenever the computer boots up, pay attention to if it says anything about boot sequence or BIOS setup in the first few seconds of booting. For most Dell systems that I’ve come across the Boot Sequence option can be reached by hitting F12 at startup. For HP it is usually F2. Other BIOS’s might be Del or any of the F keys. Then select your CD/DVD drive, and the computer will boot from it after hitting enter.
Unfortunately I was not able to get a good screenshot of the first few stages of the installation process, but I will tell about every screen that you should come across until I can show actual screenshots.
Something along the lines of “Press any key to start the disk. . .” will appear on the screen.
You will need to press a key in order to start the installation process, otherwise the disk may boot into a bootable partition that it finds on your hardrive.
“Loading Darwin x86 . . .”
The length of loading depends on your system configuration, but mostly depends on how much RAM you have. Having 2 GB of RAM is very nice compared to 512 MB.
Now I have pictures. They will go through each screen that is encountered throughout installation.

Apple Loading Screen

Choose Your Language (English for this tutorial)

Apple Loves Loading Screens

This is the Welcome Screen. Notice the silhouette break dancer. This is an image added by Kalyway. If you click on More Information, it will show you all the features Kalyway packed into the disk.
Now it gets more complicated. You need to format the hard drive at this point in the installation. To do this, go to the Utilities button on the upper OS X bar as pictured below. Then go to Disk Utilities.

The disk utility will come up. Click on your hard drive (Not any partitions you may have, see below - its in the right hand column) and then click the erase tab:

Click on the Volume Format drop down menu. I always use Mac OS Extended Journaled. You may be able to use another type, but I know for a fact that that does indeed work. Then name the partition whatever you would like, I'm partial to something plain like Leopard.
Once that is accomplished (It may take some time depending on your hard drive size and system configuration) click the red x button to exit the Disk Utility and return to the installation Welcome screen.
Click on Continue and the Agreement page will come up. Click Agree.

Then the following screen will appear telling you where you can install Leopard. It should show the partition and hard drive you just formated. If it does not then something went wrong in the formating process, but don't worry, you can still go to the Disk Utility and try it again.

Click continue and the Install Summary page comes up

VERY IMPORTANT!!!!!
You MUST Click Customize!! If you do not, your install probably will not work. The Customize screen will show you several options that you will need to select or de-select based on your own hardware configuration. If your first install does not work correctly, chances are you need to choose different options in the Customize screen:

This is the setup used for a Dell Dimension 3000 with a nVidia card in a PCI slot. The bootloader patcher used is MBR and not GUID because there is only one partition on the drive. If there is more than one bootable parition on the hard drive, and the paritions are set in GUID, then use the coresponding patcher.
Click Done, and then Install
The installer will now check the disk. If you are feeling particularly daring you can skip this process. However, I recommend going through the process at least once. There may have been an error in burning the disk, or the .iso file itself may have been slightly corrupted. As long as the disk hasn't been scratched, you really only need to check the disk once if you need to install Leopard again.
WHOO HOO! Leopard is installing!

If you did not check your disk and it has an error on it, this is the most likely step to encounter problems.
Once this is complete a green circle with a checkmark comes up saying that the Installation was successful. You will need to restart the computer (I think it may do it automatically if you are not around) and after it goes through the Darwin Bootloader, another Apple loading screen appears:

Then a very fancy video will play that welcomes you in many different languages.
Now all you need to do is set up the Leopard Basics.
Because you most likely don't have an Apple Keyboard, all you have to do is press the buttons to the right and left of the two shift keys.

Then you have to pick the type of keyboard.

Then choose your country:

THEN, select the country your keyboard is from.

The transfer screen. I did not need to transfer anything, but if you have another mac you may wish to transfer things.

Then you can input your Apple ID so that Apple can fill in your information for you. I do not know if they can detect that you are not using actual Apple hardware or not. The risk is yours to take.

Registration Information. If you input your Apple ID, it will show up here. But I blurred the stuff out because I'm not an idiot.

A Few More Questions. ENOUGH WITH THE QUESTIONS, I WANT LEOPARD! But Apple must have their way with you. Answer the questions and advance one step.

Then you need to create your user account:

Now its time for Apple to try to get you to purchase a .mac account. Personally I don't like .mac accounts because I don't think they are worth it. But you are of course entitled to your own opinion.

If you don't have .Mac, they will let you try it for free. (I said no)

ALL DONE! The Thank You Screen!

You are all done. Congratulations.

This is the default desktop and settings that Kalyway decided to use.
The file explorer has an orange background. To change this go through the following steps:
Open up an explorer:

Right click and select Show View Options:

View Options - Where it says Background: change it back to White, and then click Use as Defaults

Guess what. Your done - that is if all of your hardware is supported. If it is not, I suggest checking out these sources:
http://www.insanelymac.com/
http://wiki.osx86project.org/wiki/index.php/Main_Page
If you have any questions or comments, please post a comment at the bottom of this post. I have documented what experience I have had with OSX86 Leopard, I leave this open to you now. Please help one another.

UPDATE:
There are a few things that you should be aware of if you are doing this for the first time. The first one is that you should NEVER use the Apple updater to update your installation of Leopard. For instance, if the Apple updater pops up and says that you can update from 10.5.1 to 10.5.2 or .3, DO NOT UPGRADE UNDER ANY CIRCUMSTANCES!!! It will brick your machine and you will need to re-install Leopard again. I have created a tutorial for updating Leopard OSX86 to 10.5.2 and it is located here:
http://tgrounds.blogspot.com/2008/04/upgrading-osx86-leopard-1051-to-1052.html
The second thing that may be of use is a program called SIW, or System Information for Windows. This is useful if you do not know if your Intel processor is SSE2 or SSE3. Of course you need to have an installation of Windows to run the software, but many people do so I am providing the link:
http://www.gtopala.com/
Enjoy!
There are a few things that you should be aware of if you are doing this for the first time. The first one is that you should NEVER use the Apple updater to update your installation of Leopard. For instance, if the Apple updater pops up and says that you can update from 10.5.1 to 10.5.2 or .3, DO NOT UPGRADE UNDER ANY CIRCUMSTANCES!!! It will brick your machine and you will need to re-install Leopard again. I have created a tutorial for updating Leopard OSX86 to 10.5.2 and it is located here:
http://tgrounds.blogspot.com/2008/04/upgrading-osx86-leopard-1051-to-1052.html
The second thing that may be of use is a program called SIW, or System Information for Windows. This is useful if you do not know if your Intel processor is SSE2 or SSE3. Of course you need to have an installation of Windows to run the software, but many people do so I am providing the link:
http://www.gtopala.com/
Enjoy!