Welcome

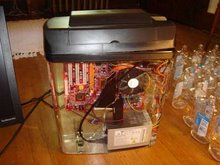
Welcome to Testing Grounds. This website will help you discover new ways of looking at the ordinary things around you. Whether it is a dusty old computer you have in the corner, or a coke machine down the street, Testing Grounds will show you how to do things you didn't think were possible. Enjoy!

What to look forward to:

Coming up on Testing Grounds, I'll show you how to do the following:

How to Install/Reinstall Windows Vista to Improve Performance

How to Backup DVD's: Defeat Any DVD Protection Including Sony and Disney

Sunday, May 6, 2007

OSX86 on a PC

Putting the OSX operating system on a PC might sound intimidating at first, but a person new to installing OSX86 can easily get it perfected in a weekend. Some would say you can get it done in much less time, but there are usually hiccups, and to be on the safe side, you need to account for those hiccups. For the most part, those hiccups include audio issues and ethernet issues, and occasionally a video card issue. It takes a while to discover the fixes for these, but after you apply them, they usually work perfectly. OK, to get started you will have to have the following pieces of the puzzle:
  • A PC that meets the compatibility requirements for OSX86 you can find this list at
  • Blank DVD-R
  • Broadband connection
  • Software for burning an iso to a disk, like Nero for example
There you go, that's it! Now you can start the process. But before you do, you need to understand a few basic things.

  1. YOU HAVE TO BACKUP YOUR STUFF!!!
  2. It is only legal to install OS X on a PC if you are an apple developer, and are in good with the folks at Apple. But if that were the case, you probably don't need this guide, so most people should probably stop reading now. For those more adventurous, keep readin.
  3. I AM NOT RESPONSIBLE FOR ANY DAMAGE THIS MAY CAUSE this is a tip showing how one might go about putting OSX on a Dell, I in no way condone doing so. Any damage to hard drives, data, or any other unforeseeable issues are not my fault, you brought them on yourself.
Now that we have the pleasantries out of the way, we can get down to the nitty gritty. You have to find a copy of the Jas installation DVD version 10.4.8. You might possibly want to start looking in Pirate Bay or the other usual sites. Keep in mind the legal stuff if you decide to do so. Then your going to need to burn that ISO to a disk, you might have some software that will do it for you, otherwise use Nero. Let the fun begin.

1.) BACK EVERYTHING UP!!!!!

2.) With the Jas 10.4.8 disk in hand, put it in your DVD-ROM drive in the computer and reboot. Press any key to continue, and let it load up with its crazy text screens.

Image Hosted by ImageShack.us

3.) Let it spin for a while, depending on your exact hardware configuration, it could take anywhere from 2 - 10 min. Be patient young padowan. Eventually a blue screen with a pinwheel will come up and stare you in the face for about a min.

Image Hosted by ImageShack.us
4.) Then a language selection screen will pop up, select whatever works for you, for me its English, and click the arrow

Image Hosted by ImageShack.us

5.) An introduction screen will pop up, click continue:

Image Hosted by ImageShack.us

6.) The next screen asks you where you would like to install OSX, but seeing as how you have a PC, nothing is available.
Image Hosted by ImageShack.us

Don't worry! go into the utilities button in the upper left hand corner and click on Disk Utility. In about a minuet the Disk Utility Screen will pop up:

Image Hosted by ImageShack.us

7.) Select your hard drive, and click on the erase button. Then for the format select the Mac OS Extended (Journaled) and name it whatever you want. Untitled is so drab, make a good name. When your done with that, click the erase button.

Image Hosted by ImageShack.us

8.) Erasing won't take too long, and when you can see that its renamed the hard drive (Or hard drive partition) click the red x in the corner to exit out. The disk will spin for a bit, then get back to the installation screen seen in step 6, only this time it will have the picture of a hard drive in it. Click on this Hard Drive, click continue, and come to the next screen.

9.) This screen is called installation options. It will have various extras you may or may not need to install OS X onto the PC. It has an AMD processor option, an Intel option, various language supports, printer support, X11, NVIDIA Titan/ATI drivers for graphics cards (Install only one if you need to, I made the mistake of choosing both and it screwed it up a bit) And if somewhere in the options there is a choice between SSE2 or SSE3, pick only one (SSE3 if you can, its the bomb), otherwise it will mess something up. But if there is only one choice(SSE2/SSE3), that makes it easier. Depending on your language and hardware setup, this step is crucial. This one screen can make or break your install, so choose wisely. If you screw something up its easy to start over, and if you do end up messing it up, don't worry, it happens to everyone.

10.) After you've decided your installation fate, click the button. I'm pretty sure once you click that button, there is no going back. you can pull the plug on the computer, but other than that I think its full steam ahead. OSX will install after a thorough disk check. Unless time is an enormous factor, Don't skip the disk check! It checks the DVD for errors, I made the mistake of doing that once and paid for it with about 5 wasted hours of frustration. My install was somehow corrupted and i had to re-download the torrent. Hiccups people, they happen.

Image Hosted by ImageShack.us

Like most installations on PC hardware, the length of time all depends on your hardware configuration. It usually takes about an hour, so don't worry about the time factor.

Image Hosted by ImageShack.us
11.) Believe it or not, the hard parts are over! Once the installation has finalized, optimized, and caused you to hold your breath, OSX will need to restart. When your PC/OSX86 beast restarts, remove the installation DVD and go through the setting up your Mac steps. It might not recognize your keyboard, it'll need your time zone, it'll need other info and so on and so forth. After that you have a brand new Mac!

Image Hosted by ImageShack.us


UPDATE: Because of this articles popularity (over 300 hits per day) and all of the questions people are having, I will not be able to help answer people’s questions anymore. Every computer is a different case, and with many cases OSX86 will not take. Sometimes when it does, the network card will not work, the graphics will be screwy, or the sound might not work. Because of the individuality of each and every computer, I cannot help you. Instead I will show you the places where I got my help at. The main resource for OSX86 problems/solutions is the InsanelyMac Forum.

http://www.insanelymac.com/

It is a website with news, rumors, and most importantly, solutions to various OSX86 problems.

http://forum.insanelymac.com/index.php?s=7aff1723af5a81c52a2a2765cca079df&showforum=85

That is the link to the Homebrew Macs section of the Forums. It has helped me many times.

I hope you find all the answers you are looking for in these websites. I wish you the best of luck.